Showing posts with label Baking. Show all posts

Thursday, May 30, 2013

My quest for perfection has finally come to a close!

If you are a long time reader of mine, you will know that I will go to great lengths to have a taste of the perfect chocolate chip cookie. Since then, I have made it my life's mission to bake the BEST chocolate chip cookie in all the land! I've tried every recipe under the moon and even though they have all been tasty, they were not perfect.

Teacher appreciation week snuck up on us this year.  Jaden and I decided to give her teacher a cookie mix in a jar. Thanks to Pinterest, I found this printable.  We followed the directions for this jar recipe.


After Jaden got the jar filled, Taylor and I made a batch of finished cookies to go with the gift. Jaden's teacher is pretty much a god in Taylor's eyes :-)  She adores him!


You guys, these turned out PERFECT! They are exactly the type of cookie I have been trying to make for like MY WHOLE LIFE.


We wrapped them up all pretty in some parchment paper and tucked them into a bag with the mix!


Here's my soon-to-be secret family recipe:

The World's BEST Chocolate Chip Cookies
Ingredients:
2 c flour
1 tsp salt
1 tsp baking soda
¾ c brown sugar
¾ c sugar
chocolate chips
1 c butter, softened
1 tsp vanilla
2 eggs

1. Preheat oven to 375°F.
2. Beat butter, vanilla, and eggs together until smooth.
3. Add dry ingredients.
4. Drop onto cookie sheet.
5. Bake for 9-11 minutes.
6. Allow to cool for a couple of minutes on the cookie sheet before transferring to cooling rack.

SO DELICIOUS!

Want to try the cookies but don't want to bake them??  Comment below (why do I get like no comments ever anymore??) and I'll randomly pick a winner to get some cookies made by me and my two cuties!


Follow Me on Pinterest

Tuesday, January 29, 2013

Low-Carb Cauliflower Pizza Crust

One of my New Year's Resolutions this year was to lose ten pounds.  I wanted to do this last year when I discovered that I no longer fit into my shorts.  Well, I still don't fit into my shorts.  BUT, I am working with a group of 11 others and am actually seeing some results!  I was mid-week, week one, when I got discouraged because I was busting my butt and not losing any weight.  Yes, it was early, but I had a goal for myself to lose at least 1½ pounds each week and it wasn't happening.  My mom advised me to lay off the carbs.  Carbs really are my downfall...  But, following her advice, I started to see the number on the scale drop!  

I was looking around Pinterest to find some low-carb recipes and came across a girl that had made a pizza crust out of cauliflower!  I wanted to give it a shot because my family was hungry for pizza and, well, I didn't want to be tempted by that doughy crust :o)


First, using a cheese grater, I grated the cauliflower.  I thought this would be difficult, but it was really very easy!


Next, I mixed all of the ingredients together.  I just sprinkled the Italian seasoning until it looked like enough.  You can use any type of herb or spice to give your crust a unique flavor.  Because I was going to make a pizza with a red sauce, I figured I couldn't go wrong with an Italian seasoning!


After everything is mixed together well, I pressed the mixture onto a greased baking sheet.


Then, I baked the crust for 15 minutes at 450 degrees.


When the crust was done baking, I cut it into four pieces.  My family was having their pizza on crescent dough, so I just put the remaining pieces in the freezer to save for another day!


Finally, I topped my crust with pizza sauce, grilled chicken chunks (pre-cooked), red pepper slices, onion slices, diced green pepper, and a little more mozzarella cheese.  I baked it on the same tray as the crescent pizzas for about 11-13 minutes at 375 degrees and they came out perfect!


This was the BEST pizza I have ever had, homemade or restaurant.  There was so much flavor and it didn't taste like cauliflower at all!  I can't wait until my family requests pizza again :o)

In case you were wondering, after one week, I am down 2 pounds!  I'm on my way to fitting back into those stinkin' shorts!!


Follow Me on Pinterest


Wednesday, February 1, 2012

Shanterest: Valentine's Day Edition

Because the good 'ol people I work for resemble the front side of a horse walking backwards, I no longer get to browse through Pinterest on my breaks.  I have every intention of getting on in the evenings, but I am the busiest person in Indiana these days.  No sarcasm in that last statement at all.  You'll be glad to know that I pulled every last piece of crap useful, totally worth saving, treasure out from underneath the basement steps and am now in the process of organizing said crap treasure.  I'll post on that later.  Right now, we have some business to tend to.  It's what I like to call Shanterest!  If I was able to pin, this is what would be hitting my boards for Valentine's Day!
Valentine's Day Edition

BOARD: For the Kiddos


BOARD: Gifts

I originally got this idea from my friend, Melissa.  Thanks for such a neat idea, Melissa!!


BOARD: Holidays
null


BOARD: Food to Try
Cupid's Cupcakes


BOARD: Fashion
scarlet


Tuesday, August 30, 2011

Sinful Oreo Cupcakes


OMG. I found a recipe for Oreo cupcakes and instantly gained 10 pounds when I read it.

Ingredients:
1½ cups all purpose flour
½ cup natural unsweetened cocoa
1¼ cup sugar
¾ teaspoon baking soda
½ teaspoon baking powder
½ teaspoon salt
2 eggs
½ cup vegetable oil
1 teaspoon vanilla
¾ cup milk
¾ cup hot water
24 Oreos, plus more for crumbs

**NOTE: Bakerella told me this recipe would, "Makes at least 12 cupcakes."  I should inform you that it makes 24.  I doubled the recipe because I wanted at least 24 cupcakes and ended up with FOUR DOZEN.

Preheat oven to 350 degrees.
Mix the flour, cocoa, sugar, baking soda, baking powder and salt in a large mixing bowl using a wire whisk.


Add the eggs, oil, vanilla and milk and mix well until thoroughly combined.
Add the hot water and mix until combined.


Line tray with baking cups.
Place one whole cookie in each cup.
 

 Transfer the batter (it will be very liquid) to a large measuring cup and then pour batter into each baking cup so it’s about three quarters full. 

Bake for 16-18 minutes.


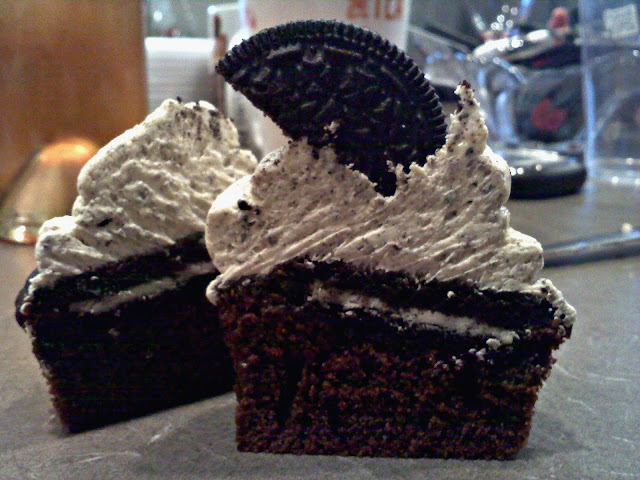
Because the batter is actually liquid, the Oreos floated to the top!


 Are you drooling yet?  Just wait, my pretties!

The Frosting


 Ingredients:
1 cup shortening
1 lb. powdered sugar
1 teaspoon vanilla
3-6 Tablespoons milk
2 or more teaspoons Oreo cookie crumbs

Beat the shortening in a mixer until smooth.
Add vanilla and mix until combined.
Add the powdered sugar in three additions, scraping down the sides after each addition.
Add a Tablespoon of milk at a time and mix together until you achieve the consistency you like.
Add the cookie crumbs and mix until completely combined.

Place frosting in a baggie and clip the tip, making your own decorating bag!
Swirl frosting on top of each cupcake.

Insert a cookie on top of each cupcake.


You will definitely want to double the frosting recipe if you are wanting as much frosting as shown on my cupcakes.  Why wouldn't you want that much frosting??


Check out the cookie in the middle!!

Taylor gave them two thumbs up! 

I'm linking this little piece of heaven to all of my favorite linky parties!

ENJOY!


Vote for me @ Top Mommy Blogs - Mom Blog Directory

Wednesday, August 10, 2011

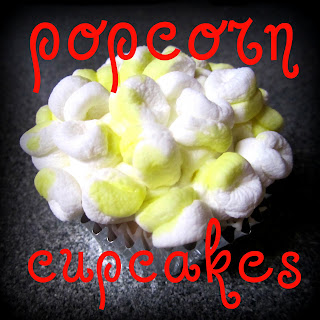
Popcorn Cupcakes


These cute little cupcakes are so fun to make!  I'm warning you though, they take a LOT of time!

Ingredients:
Cake Mix (and the water, oil, and eggs that go with it!)
White Frosting
Mini Marshmallows
Yellow Food Coloring

First, bake the cupcakes as directed until they test done.  Let cool.

Frost your cupcakes.  LISTEN to me when I say, frost them as you go!  You do not want to do them all at once like I did because then the marshmallows have a hard time sticking to the icing.

To Make the Popcorn

Cut the marshmallows in half.

Firmly press them back together so your fingers are basically touching.  This creates the popcorn-like dimple.

Stick 'em onto the icing!

Fill the cupcake with as many as you can.

Dilute yellow food coloring with water.  You want it to be really light so start with one drop only and work your way up if need be.

Paint the yellow "butter" on the marshmallow popcorn.


There you have it!  The marshmallows taste really good on the cupcakes!  These would be great for a movie night party. 

I'm linking these up to all of my favorite linky parties!


Vote for me @ Top Mommy Blogs - Mom Blog Directory