We got our
February issue of Disney FamilyFun in the mail last week. As soon as I saw the cover, I knew I would have to make these shirts for the girls! The instructions I used, provided by Disney FamilyFun, are available on their
website.
I added an additional step to Taylor's shirt. I couldn't find a pink long-sleeve T in her size, so I had to get a short-sleeve shirt for her. No prob! I just added some sleeves!
Waffle-Sleeve Layered T-Shirt
Supplies
Child's T-shirt
Adult Waffle T
Paper Doily
T-shirt Paint
Sponge Brush
Stick with me on this one... I kind of did it as I went with no instructions. First, measure the sleeves of a shirt that fits your child well. Then, subtract the length of the sleeve on the t-shirt. This is how long you want your waffle sleeves.
Don't worry about cutting extra length. You'll have enough with this next step. I forgot to subtract the length of the t-shirt sleeve at first so Taylor's sleeves were about 3-4 inches too long. If you forget, no biggie. You can trim them later.
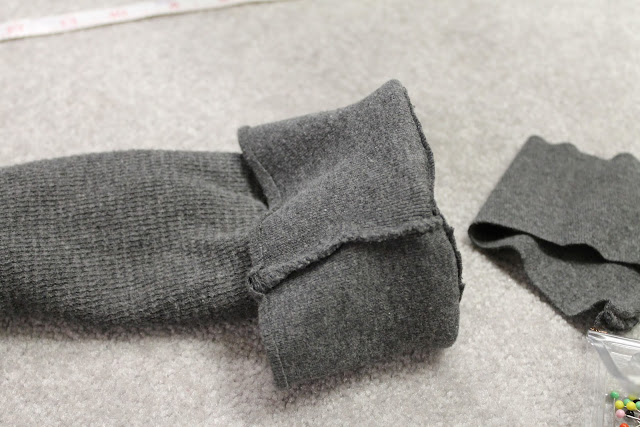
Next, you'll need to cut the back of the cuff off. We are going to make a smaller cuff and only want one layer of fabric to work with. Does that make sense? You know how a cuff is folded over? Cut the back part off.
Next, lay a child-size sleeve on top of the waffle sleeve. Cut the seam off of the waffle sleeve. Leave about a quarter-inch for your new seam.
Now, open the sleeve to the back (inside) side. Turn the cuff up and pin.
Sew in place, creating a new, shorter cuff.
Next, fold the sleeve with the inside facing out. Match up the cut sides and pin in place.
Sew the sides together, about ¼ inch from the edge.
Then, serge if you have one. If not, just zig-zag!
Trim the extra off, as close to the zig-zag as you can.
Turn the sleeves right-side out and attach them to the t-shirt sleeves, trimming off any extra.
Now, on to the fun part :o)
Be sure to put a layer of wax paper or shiny newspaper inside your shirt. Using regular newsprint will cause it to stick to your shirt... not that I would know or anything...
Get a couple of paper doilies and lay them onto the t-shirt. Disney FamilyFun suggests putting a little glue (glue stick or spray adhesive) on the back. I didn't. I was just extra careful not to move them.
Then, very carefully dab the paint onto the doily in an up-down motion. DO NOT brush the paint.
Use a light touch. You can always go back over the pattern. Be careful not to get too much paint on your sponge because it will seep under the doily.
Lift the doily and admire your work!
Because my pattern left space for it, I added i [love] u and be mine.
Since my shirt was longer, I put three hearts on it.

Cutie patooties!!
This took me about an hour. The stencil part was fast... about 10 minutes per shirt. I got my doilies at Kroger. Jaden's and my shirt came from Target and Taylor's is from Hobby Lobby. The waffle T came from Mike's closet :o)


