Showing posts with label Food. Show all posts

Sunday, October 6, 2013

PIZZA Day!

 
Every so often, we have pizza night at our house. When this happens, the girls like to "decorate" their own pizzas!
 
 
First, we start with a crescent roll crust covered with pizza sauce.

 
Next, we add our favorite toppings... Pepperoni is always a must when it comes to my girls!

 
Then, we top them with cheese!

 
Jaden likes her pepperont on top of her cheese while Taylor buries her roni beneath... Opposites in every way, these girls!

 
Finally, we pop them in the oven at 350 for 8-10 minutes. They come out golden brown and melted every single time!

 
Yumm-O!  You want to join us for pizza night sometime??
 
 
I'm participating in the Nester's 31 Day Challenge!


Follow Me on Pinterest

Thursday, August 22, 2013

An Apple A Day...

When we moved into our house last summer, we inherited an apple tree. I wasn't very excited about it because growing up, I remember walking down the alley to my best friend's house. There were always those soft, green, apple-like things all over the alley. I don't know if it was the apples or the caged German Shepherd, but that alley smelled awful!  To this day, I pair that smell with those apples (or whatever they were).  So, when we learned of our apple tree, I just knew we'd have that smell in our backyard... yay.

The apple tree became a nuisance.  Mike would have to pick up the fallen apples before he mowed each time.  Although it didn't reek like I had expected, it was still a pain compared to the rest of the trees in our yard.

Dad came over a month or so ago and grabbed a couple of apples off of the tree. He was going to eat them! What?!  I never even considered eating the apples!  I don't know why the thought never crossed my mind. Maybe it was still the stinky apples that I remembered growing up. I know that those (if they even were apples) were not to be eaten.  I was surprised that Dad wanted to eat them.  I told him he could take as many as he wanted... What was I going to do with them??  In the meantime, I continued to buy apples every week at the store.  Yes, I am aware of how ridiculous this sounds.

Last night, I was out back grilling our dinner and I noticed how many apples were on the tree. It amazed me!  Wow! I actually have apples on my apple tree!


I gave the girls a bag and told them to get picking!  We were going to be set for LIFE!


Although small, these apples looked great!


I washed and cut one for Taylor and I to try. It was delicious! A little tart, but very good!  I will not be buying apples from the store this weekend, that's for sure.


We have enough to feed an army! Come on over and fill a bag!  I'm excited to eat fresh apples all fall :-)


Follow Me on Pinterest

Tuesday, January 29, 2013

Low-Carb Cauliflower Pizza Crust

One of my New Year's Resolutions this year was to lose ten pounds.  I wanted to do this last year when I discovered that I no longer fit into my shorts.  Well, I still don't fit into my shorts.  BUT, I am working with a group of 11 others and am actually seeing some results!  I was mid-week, week one, when I got discouraged because I was busting my butt and not losing any weight.  Yes, it was early, but I had a goal for myself to lose at least 1½ pounds each week and it wasn't happening.  My mom advised me to lay off the carbs.  Carbs really are my downfall...  But, following her advice, I started to see the number on the scale drop!  

I was looking around Pinterest to find some low-carb recipes and came across a girl that had made a pizza crust out of cauliflower!  I wanted to give it a shot because my family was hungry for pizza and, well, I didn't want to be tempted by that doughy crust :o)


First, using a cheese grater, I grated the cauliflower.  I thought this would be difficult, but it was really very easy!


Next, I mixed all of the ingredients together.  I just sprinkled the Italian seasoning until it looked like enough.  You can use any type of herb or spice to give your crust a unique flavor.  Because I was going to make a pizza with a red sauce, I figured I couldn't go wrong with an Italian seasoning!


After everything is mixed together well, I pressed the mixture onto a greased baking sheet.


Then, I baked the crust for 15 minutes at 450 degrees.


When the crust was done baking, I cut it into four pieces.  My family was having their pizza on crescent dough, so I just put the remaining pieces in the freezer to save for another day!


Finally, I topped my crust with pizza sauce, grilled chicken chunks (pre-cooked), red pepper slices, onion slices, diced green pepper, and a little more mozzarella cheese.  I baked it on the same tray as the crescent pizzas for about 11-13 minutes at 375 degrees and they came out perfect!


This was the BEST pizza I have ever had, homemade or restaurant.  There was so much flavor and it didn't taste like cauliflower at all!  I can't wait until my family requests pizza again :o)

In case you were wondering, after one week, I am down 2 pounds!  I'm on my way to fitting back into those stinkin' shorts!!


Follow Me on Pinterest


Saturday, October 13, 2012

Shanterest: Pumpkin Muffins


Day 12: Pumpkin Muffins with Crumble Topping

Ready to be really jealous??  I'm taking part in a weekend full of scrapbooking! I went last night, am going back all day today, and then again tomorrow morning!  I can't wait to show-and-tell :o)

During this event, meals are provided.  I signed up for Saturday morning breakfast.  I thought that pumpkin muffins would be a great idea!  I found many recipes on Pinterest, but this one looked super easy. 


I love baking from scratch.  Box mixes are great for some things, but when it comes to muffins, no mixes allowed!  This recipe turned out great!

One problem... As I was measuring out the flour:
Jaden: "Mom.  Mommy."
Mike: "Jaden, she can't talk. She's counting."
Jaden: "1,2,3,4,5,6,7,8,9,10,11....."
Me: "JADEN! Stop!"

aaannnnnndddd... the first batch aren't as puffy as the second batch.  Oh well.  I tested them and they are delish!

Follow Me on Pinterest

Monday, October 8, 2012

Shanterest: DIY Fruit and Veggie Wash


Day 7: DIY Fruit and Veggie Wash


So, I came across this pin and thought it was definitely in need of a re-pin.  I super simple way to clean fruit and veggies, not to mention a way of getting rid of that ugly white wax look.  I eat fruit daily and so I thought I'd give it a shot!


The fruit still had the wax look to it.  I was pretty bummed because this process was so easy! Oh well :o)  You win some, you lose some!

I'm needing some more ideas! Let me know if you are on Pinterest so I can follow your boards.  If there is one pin that you have been wanting to try but haven't, let me know!  I'll be your guinea pig :o)

Follow Me on Pinterest

Sunday, October 7, 2012

Shanterest: Cheesy Garlic Pull-Apart Bread


Day 6: Cheesy Garlic Pull-Apart Bread


This was the second time I made this bread and it definitely turned out better the first time. Actually, it was pretty awesome the first time!  Just know that it takes an entire day to prepare.  Don't try to cut the time because it turns out doughy in the middle and burnt on the outside.


Follow Me on Pinterest

Tuesday, May 22, 2012

Jalapeno Popper Stuffed Chicken

I have recently gotten tired of fixing the same meals every couple of weeks.  It seemed as though we had no variety and were always eating the same thing over and over.  Obviously I turned to Pinterest!  This week, almost every one of our meals has a recipe I found on Pinterest.  Last night, we had:

Jalapeno Popper Stuffed Chicken
photo from pin originating at CassieCraves.blogspot.com

The recipe was super easy and so good!  I did tweak it a teensy bit (my variations are in red) though to better fit our taste.  I served this with sweet corn on the cob and pineapple chunks.

Here is Cassie's recipe... with my variations.  Thanks, Cassie!!


Jalapeno Popper Stuffed ChickenSource: adapted from Allrecipes

1 8-ounce package cream cheese, softened  
I used fat free whipped cream cheese spread.
1/2 cup shredded cheddar cheese  I used Habanero flavored cheese.
2 jalapeno peppers, seeded and minced
4 strips of bacon, diced  I left the bacon out.
4 (6 ounce) skinless, boneless chicken breast halves
1 cup seasoned bread crumbs (I used regular bread crumbs and seasoned them with salt, pepper, garlic powder and onion powder)  I didn't season the bread crumbs.
1/4 cup vegetable oil  I left this out.

1. Cook the bacon in a skillet over medium heat until crispy. Drain on paper towels.  I skipped this step because we didn't use bacon... Mike doesn't care for it much.

2. Stir together the cream cheese, cheddar  Habanero cheese, bacon, and jalapenos in a small bowl.

3. Cut a pocket horizontally through the thickest side of each chicken breast, and fill with 1/4 of the cheese mixture. Secure with toothpicks.  Because it was just the two of us eating this, I cut the recipe in half.  Also, Mike and I usually just split one chicken breast half.  I was still able to cut a pocket, but I didn't use toothpicks to secure it.  The pocket actually turned out being like a bowl for the cheese mixture.

4. Roll the chicken breasts in bread crumbs to coat. Heat the oil in a skillet over medium-high heat, and cook chicken breasts until no longer pink in the center and the juices run clear, about 8 minutes per side. If your chicken breasts are thick, like mine were, they can be finished in a 350-degree oven.  I didn't fry my chicken.  I just placed the stuffed chicken on a lightly greased baking sheet and baked at 375° for about 20-30 minutes, until done.

It was really good!  Mike and I both agreed that we will definitely be having this one again!  On a side note, Taylor tried corn on the cob for the first time and LOVED it!  she was super cute eating it, too :o)

Wednesday, March 21, 2012

Crescent Carrots!

So, you're on Pinterest, right?  A couple of weeks ago, I was invited to a PINTEREST PARTY! I know, right?  Awesome.  It was so much fun and a really cool idea.  I'll post more about it later, but my contribution came in the form of these babies:

Super easy to make!  Just follow along :o)
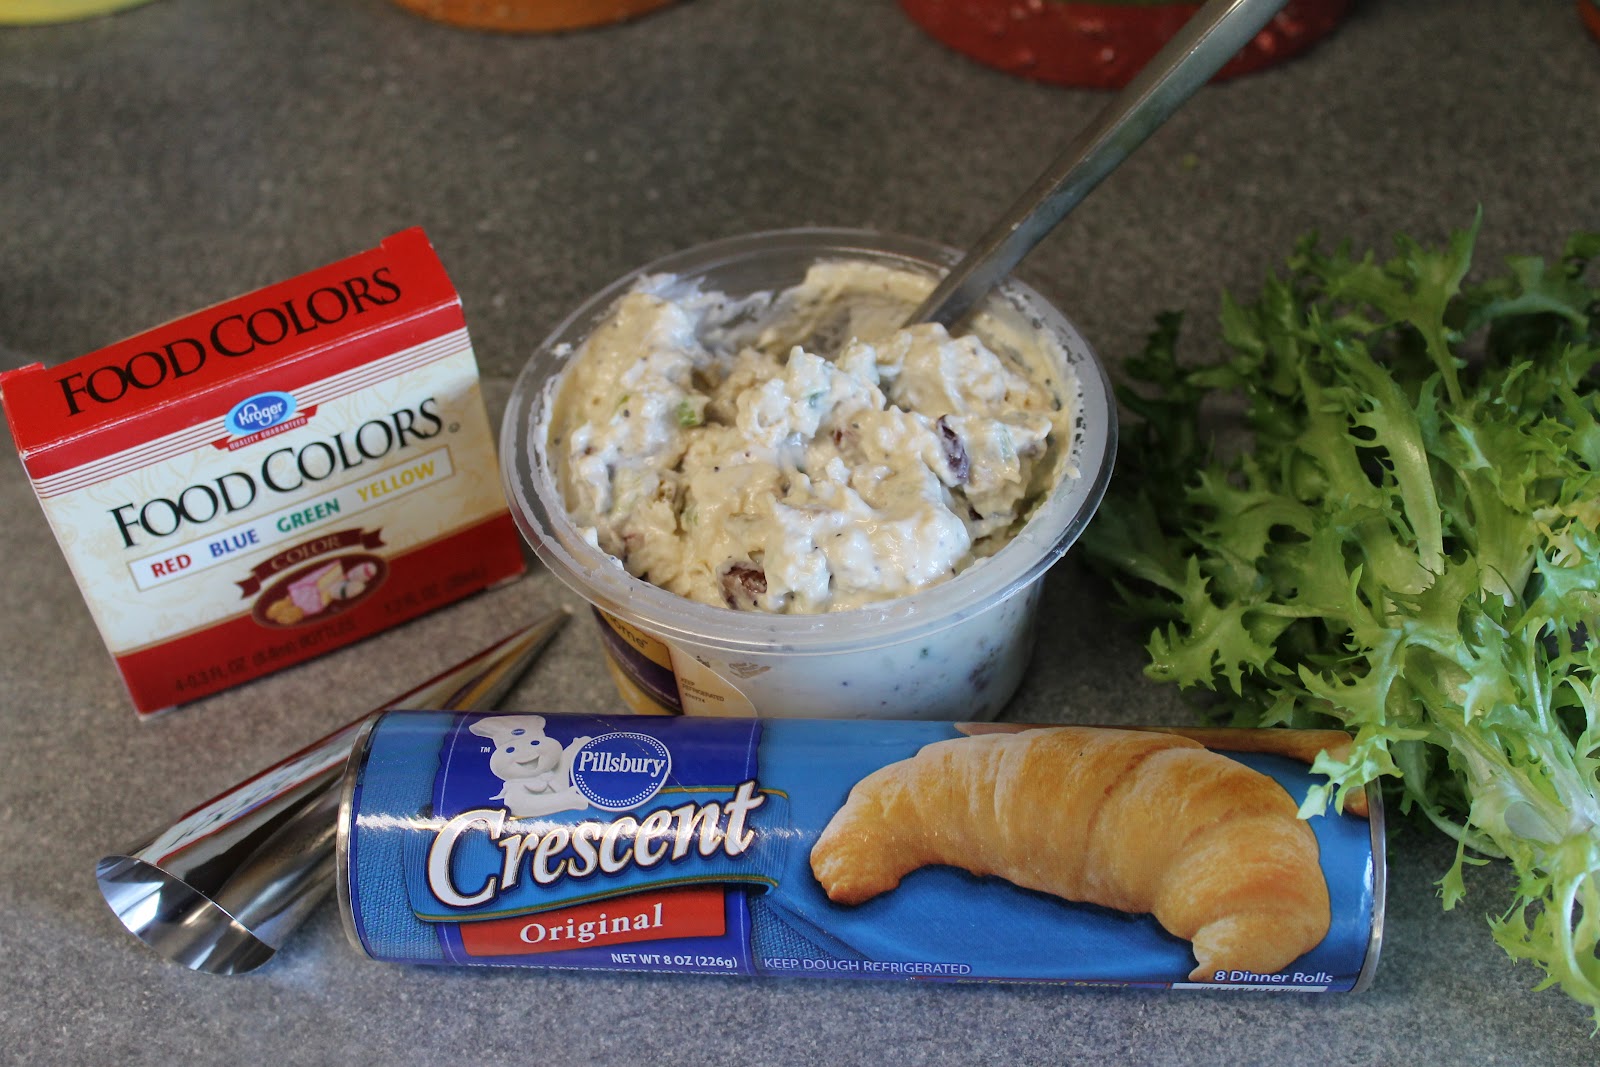

Ingredients
2 tubes of refrigerated crescent roll dough
Orange food coloring
Endive lettuce
½ lb. sandwich spread

You'll also need cream horn cones... It sounds really strange, but they are actually pretty neat! I got mine at a kitchen store and paid only a couple of bucks for a box of six.  J said they looked like tiny party hats :o)

---

Ok, first spread your dough out and pinch all of the seams together.

Next, cut the dough into six equal strips.  Roll each strip so it makes a long, skinny snake (technical food terms here!)

Then, wrap each snake around your cream horn cones.  Make sure there is cone sticking out of the top or else it might make removing them a little difficult.

Next, mix up a little orange food coloring (red and yellow make orange... in case you failed art) and paint it on the rolls with a basting brush.  I added a couple of drops of water to thin it out a bit.

Bake according to the directions on the crescent tube.

Remove the tiny party hats to reveal a perfect cone that just screams, "stuff me!"

For the stuffing, I used chicken salad that I bought from my deli. You could use anything really.  I wanted to make egg salad to stuff in it (as a ways to use up Easter eggs), but sadly, I do not know how to make it.

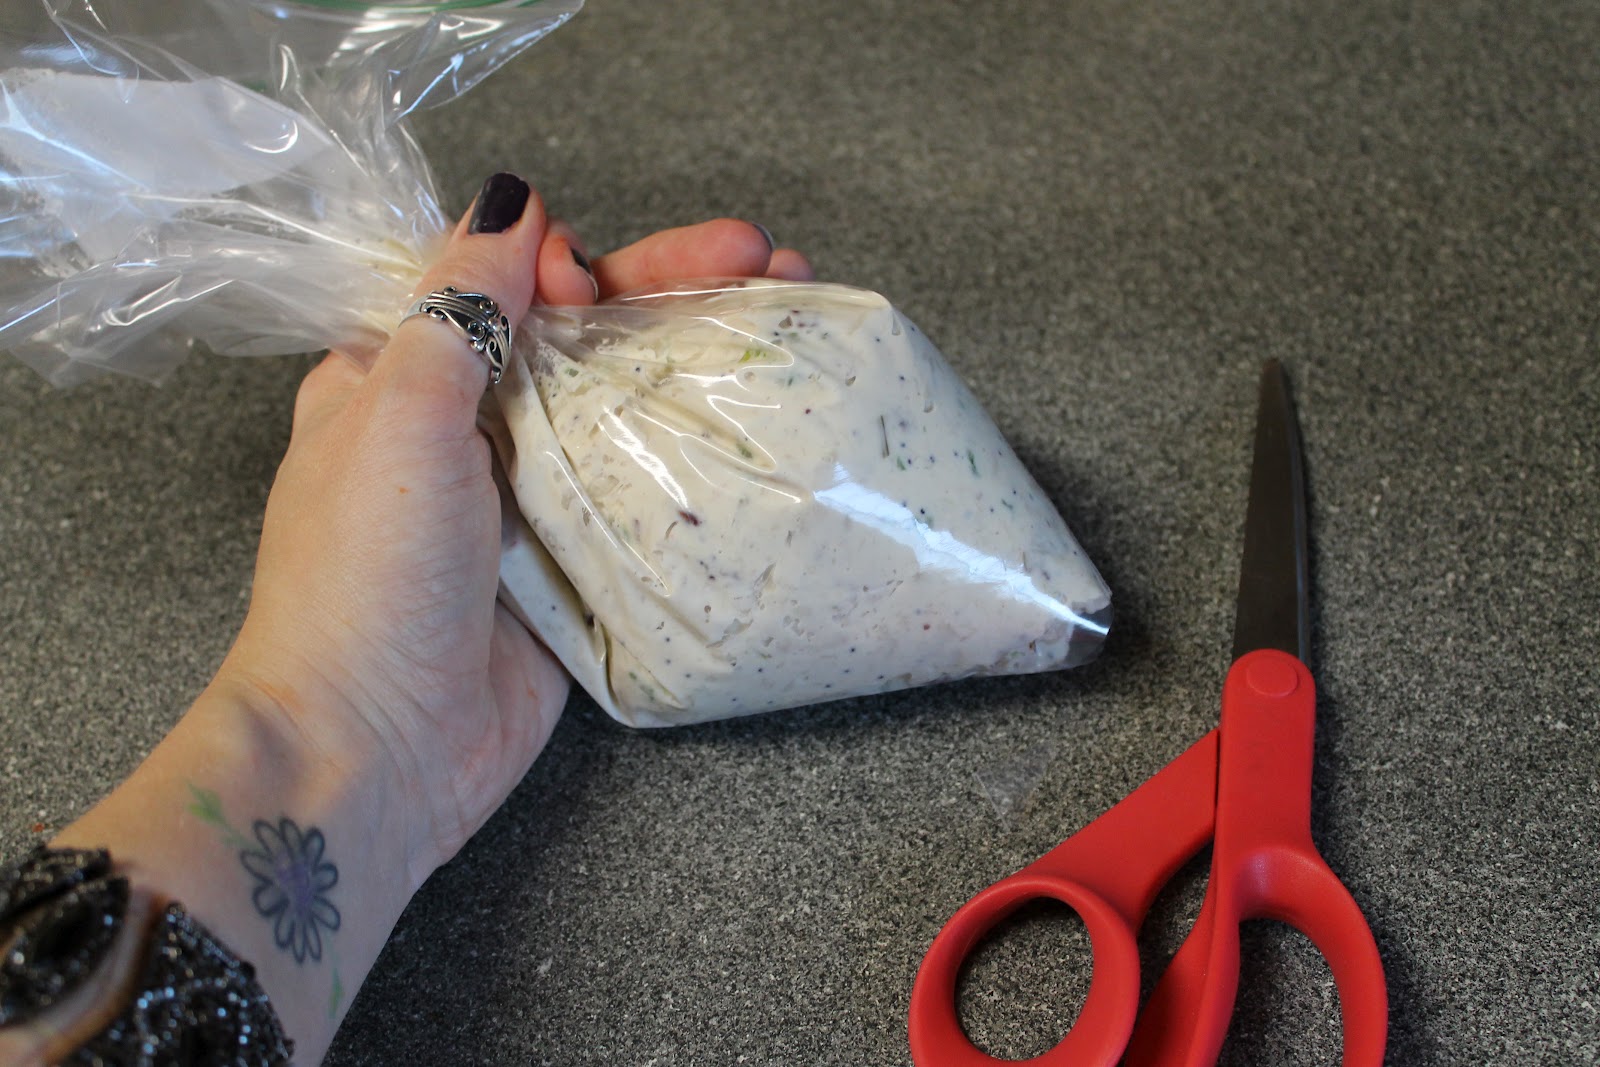
Put your sandwich spread in a plastic baggie.

Snip the corner off of the bag.

Fill your cones!

Finally, stick a leaf of lettuce in the top!  I like the endive lettuce because it looks more like a carrot top.

There you have it!  Cutsie little Easter sandwiches!  

You can download the recipe page here: Crescent Roll Carrots


I'm linking these up to my favorite linky parties AND adding them to the book... Did you know I'm writing a book?  Well, a collaboration with my bestie from the westie :o)  Due out sometime in the next 50 years or so...  Anyway, ENJOY!